If your shower in Naperville or the Chicago suburbs always looks dingy, even right after you clean it, you are not alone. Soap scum, mold on caulk, and dark grout lines are normal in a busy family bathroom, but they do not have to be permanent.
When you seal shower tile and grout, you add a clear, protective shield. It helps block water, stains, and mold, makes weekly cleaning easier, and helps your tile and grout last longer. Think of it like a clear raincoat for your shower.
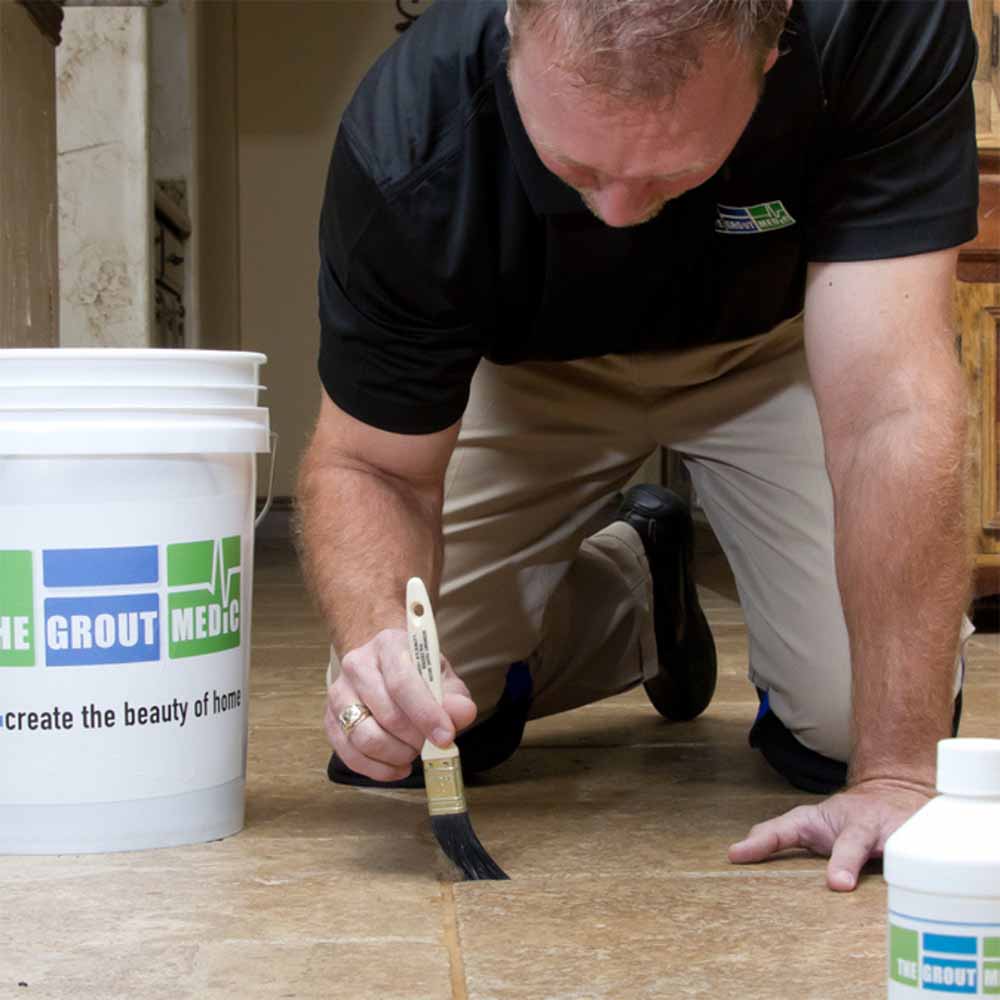
This guide walks you through when to seal, how to choose the right sealer, and step-by-step how to do it safely, even if your bathroom gets heavy use. If grout is cracked, missing, or badly stained, sealing alone will not fix it. In that case, a pro regrouting service is usually the smarter move. Local specialists like The Grout Medic in Naperville can handle deep cleaning, regrouting, and sealing if the project feels like too much.
Why Sealing Shower Tile And Grout Matters For A Cleaner, Healthier Bathroom
A sealed shower looks better and stays fresher between cleanings. It also helps protect what you cannot see.
When grout and tile stay unsealed, water, soap, and body oils soak in. That leads to:
- Mold and mildew in corners and grout lines
- Stains that never seem to scrub away
- Musty smells that come back days after cleaning
- Loose or hollow-sounding tiles over time
Sealing will not turn an old shower into brand new tile, but it can slow wear and help you hold the line on mold and grime.
How Sealer Protects Grout From Water, Stains, And Mold
Grout looks hard, but it is actually porous, like a dry sponge. Tiny holes pull in water, shampoo, and dirt every time someone showers.
A good sealer soaks into those tiny pores and sets up a barrier inside. Picture pulling a raincoat over your grout and some types of tile. Water can still hit the surface, but it does not soak in as fast.
Because the surface dries quicker:
- Mold and mildew have less moisture to feed on
- Soap scum sits on top, which makes it easier to wipe
- Stains take longer to form and are easier to remove
You still need regular cleaning, but your cleaning products can work on the dirt instead of fighting deep, set-in grime.
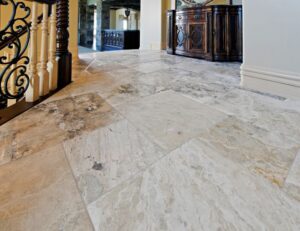
Signs Your Shower Tile And Grout Need Sealing Or Resealing
Not sure if your shower needs help? Watch for these simple signs:
- Grout turns dark when wet and stays darker for a long time
- Grout looks chalky, powdery, or rough
- Stains will not lift, even after a good scrub
- Tile that once looked shiny now looks dull or rough
- Water used to bead on the surface, but now it spreads out
- You cannot remember the last time the shower was sealed
Fresh grout or new tile always needs sealing after it cures. Your installer or product bag often lists a cure time, usually a few days.
If grout is falling out, deeply cracked, or has black mold that does not budge, sealing is not enough. At that point, pro regrouting and repair will give you better results and protect your walls from water damage.
Choose The Right Sealer For Your Shower Tile And Grout
The right sealer depends on your tile type, your grout, and how your family uses the shower. Picking the wrong product can leave stone etched or tile sticky.
Keep the process simple and start with what you are sealing.
Know Your Shower Surface: Ceramic, Porcelain, Or Natural Stone
Look closely at your tile:
- Ceramic tile often has a colored top layer and a different color inside. Edges may look a bit rough where cuts were made.
- Porcelain tile is usually the same color all the way through and feels denser and heavier.
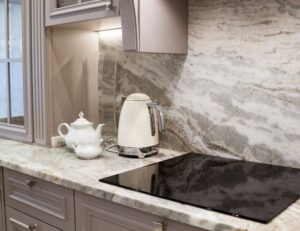
- Natural stone (marble, travertine, slate, granite) has natural veining, small pits, or layers that do not repeat from tile to tile.
This matters because many natural stones need a special penetrating sealer and gentle cleaners. Acidic products can etch marble or travertine and leave permanent marks.
If you are not sure what material you have, take clear photos and reach out to a local tile and grout specialist in Naperville for advice before you buy anything.
Penetrating Vs Surface Sealers: Which Works Best In A Wet Shower
Most shower projects use one of two broad sealer types.
- Penetrating (impregnating) sealers soak into grout and porous stone. They protect from inside and usually do not change the feel of the surface much.
- Surface or film-forming sealers sit on top and create a visible coating. They can add shine, but in a shower they may peel, bubble, or get slippery.
For shower walls and floors, a quality penetrating sealer is usually the safer choice. It helps fight water and stains without turning the floor into an ice rink.
If your grout color is badly uneven or stained, a color sealing product can help. This type of sealer coats the grout with a uniform color and strong protective layer. Many pros offer color sealing as a service, since it takes careful prep and skill.
Safety, Smell, And Dry Time: What To Look For On The Label
Before you buy, check the label for:
- Approved use on showers, baths, or wet areas
- Safe for indoor use
- Low odor or water-based formula if your bathroom has weak ventilation
- Recommended dry and cure time before the shower can get wet
Always test in a small, hidden spot first, like a corner behind a door or under a shampoo caddy. Make sure the sealer does not darken the tile or grout more than you like.
Step-By-Step: How To Prep Your Shower Before You Seal Tile And Grout
Prep is where most DIY jobs go wrong. If the surface is not fully clean and dry, sealer can trap dirt and moisture. That can lead to mold, blotchy spots, or peeling later.
Take your time with this part.
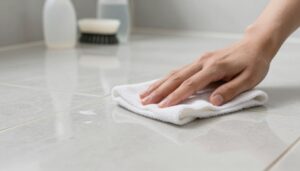
Deep Clean Tile And Grout So Sealer Can Soak In Evenly
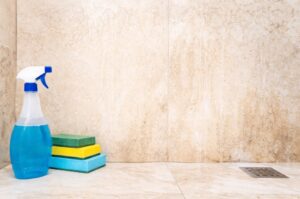
Start with a thorough cleaning:
- Spray a mild tile and grout cleaner on walls, floors, and grout lines.
- Scrub with non-scratch pads and soft brushes. Focus on corners and soap dishes.
- Rinse very well with clean water to remove all cleaner residue.
Avoid harsh acids, wire brushes, or scrub pads made for metal. These can damage grout, caulk, and natural stone.
Any leftover soap, body oil, or cleaner can block the sealer from soaking in. Rinsing well is just as important as scrubbing.
Repair Cracked Grout, Missing Caulk, And Loose Tiles First
Sealer is not a repair product. If something is broken, fix it before you seal.
- Patch small cracks or pinholes in grout with matching grout.
- Cut out and replace moldy or split caulk in corners and along the tub or shower base.
- Do not ignore loose or hollow-sounding tiles.
Large areas of missing grout, moving tiles, or signs of water damage behind the wall are a red flag. That is the time to stop and call a tile and grout repair specialist instead of trying to push through alone.
Let The Shower Dry Fully So Moisture Does Not Get Trapped
Moisture trapped under sealer can cause cloudy tile, stains, or hidden mold. After cleaning and repairs:
- Let the shower dry at least 24 hours
- Run a fan and open a window or use the bath fan for airflow
- Keep the shower completely unused during this time
Before you move on, check the grout with a bright light. If you still see dark, damp-looking spots, give it more time.
How To Apply Sealer To Shower Tile And Grout Like A Pro
Once the shower is clean, repaired, and dry, you are ready to seal. Work slowly and keep your steps small.
Gather The Right Tools And Protect Nearby Surfaces
You will need:
- Sealer made for your tile and grout
- Small brush or foam applicator
- Small tray or cup
- Clean microfiber cloths
- Painter’s tape and old towels
- Gloves and eye protection
- A fan for ventilation
Cover nearby metal fixtures or glass if the label warns about contact. Keep kids and pets out of the room until you are done and the area is dry.
Apply Sealer Carefully To Grout Lines And Porous Tile
Pour a little sealer into your tray or cup. Then:
- Start at the top of the shower and work down.
- Use your brush or foam applicator to wet each grout line. You want it damp, not flooded.
- If your tile is porous stone or unglazed, coat the tile face as well.
Let the sealer sit for the time listed on the bottle so it can soak in. Do not rush this part.
Wipe Off Extra Sealer And Avoid Slippery Surfaces
Any extra sealer left sitting on tile or glass can dry sticky, hazy, or slick. Before it dries on the surface:
- Wipe tile and fixtures with a clean microfiber cloth
- Focus on the floor so it does not turn slippery
- Check corners and ledges for drips or puddles
If the product allows a second coat, add it after the first coat time and wipe again. Older or very porous grout often needs two coats for good protection.
Let The Sealer Cure Before You Use The Shower Again
Drying and curing are not the same. The surface may feel dry, but the sealer still needs time to harden inside the grout.
Most products ask you to:
- Keep the shower dry for at least 24 hours
- Avoid harsh cleaners for several days
Plan the job on a day when you can use another bathroom. Your patience here pays off in better protection.
How Often To Reseal Shower Tile And Grout And When To Call A Pro
After the first sealing, your job shifts to light maintenance and simple checks.
Simple Tests To Know When It Is Time To Reseal
An easy way to test your sealer:
- Drip a few drops of water on a grout line.
- Watch what happens for a minute or two.
If water beads up and stays on top, your sealer is still working. If it soaks in fast and the grout darkens, it is time to reseal.
In a busy family shower, most grout needs resealing every 1 to 3 years. Keep a note on your phone or calendar with the last sealing date.
Everyday Habits That Help Your Shower Sealer Last Longer
Small daily steps help your sealer and your shower last longer:
- Run the bath fan during showers and for 15 to 20 minutes after
- Use a squeegee on walls and doors to pull off extra water
- Wipe corners and ledges where water collects
- Clean with gentle, pH-neutral cleaners instead of harsh bleach or strong acids
These habits cut down on moisture and grime. That supports the sealer and keeps mold away.
When DIY Sealing Is Not Enough And You Need Tile And Grout Pros
Sometimes problems run deeper than surface dirt. Call a tile and grout pro if you see:
- Deep or black stains that do not lift with cleaning
- Grout that crumbles or falls out
- Loose or hollow-sounding tiles
- Mold that keeps coming back in caulk lines
- A musty smell that lingers even after cleaning
In these cases, professional steam cleaning, regrouting, recaulking, or repair often needs to happen before sealing. Homeowners in Naperville and the greater Chicago area can schedule a visit with a local tile and grout specialist for expert inspection, deep cleaning, and a long-lasting sealing solution.
Conclusion
Sealing your shower tile and grout gives you a cleaner-looking shower, less mold and mildew, easier weekly cleaning, and longer-lasting surfaces. The basic path is simple: clean, repair, dry, seal, and maintain.
If your shower just needs protection, you can follow these steps and handle sealing yourself. If you see damage, stubborn stains, or signs of hidden water, it is smarter to bring in a trusted local tile and grout restoration company. A professional eye and proper repairs can save money over time by stopping bigger water damage problems before they grow.
If you live in Naperville or the greater Chicago area and are tired of fighting your shower, reach out to a local grout specialist for a professional evaluation and a sealing plan tailored to your bathroom. Your future self, and your grout, will thank you.